A well-designed contact form is an essential element of any website. It allows visitors to reach out to you, making it easier to engage with your audience and convert leads into customers. In this article, we will guide you through the process of creating a custom CSS contact form for your website. We'll provide step-by-step instructions and code snippets to help you implement it effectively. So, let's get started!
Table of Contents
- Understanding the Importance of a Contact Form
- Setting up the HTML Structure
- Styling the Contact Form with CSS
- Adding Validation to the Form
- Enhancing the User Experience with JavaScript
- Conclusion
Understanding the Importance of a Contact Form
A contact form acts as a communication bridge between your website and its visitors. It allows users to easily send inquiries, provide feedback, or request information without the need for email clients or external platforms. Here are a few reasons why a well-designed contact form is essential:
- Professionalism: A custom contact form adds a touch of professionalism to your website, demonstrating that you care about user experience and providing a convenient means of contact.
- User Engagement: By simplifying the communication process, you encourage visitors to engage with your website and establish a connection.
- Lead Generation: A contact form serves as a lead generation tool, capturing valuable information from potential customers that can be used for marketing purposes.
- Spam Prevention: Contact forms can include security measures like CAPTCHA to prevent spam and ensure that genuine inquiries reach you.
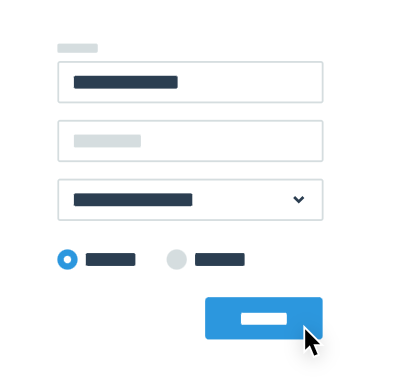
Setting up the HTML Structure
To create a custom CSS contact form, we first need to set up the HTML structure. Follow these steps:
- Create an HTML form element using the < form> tag.
- Add appropriate input fields using the < input> tag for the visitor's name, email, subject, and message.
- Include a submit button using the < button> tag to allow users to send the form.
- Don't forget to add labels for each input field to improve accessibility and user experience.
Here's an example of the HTML structure:
Html code
<form id="contact-form">
  <label for="name">Name:</label>
  <input type="text" id="name" name="name" required>

  <label for="email">Email:</label>
  <input type="email" id="email" name="email" required>

  <label for="subject">Subject:</label>
  <input type="text" id="subject" name="subject" required>

  <label for="message">Message:</label>
  <textarea id="message" name="message" required></textarea>

  <button type="submit">Submit</button>
</form>
Styling the Contact Form with CSS
Once you have set up the HTML structure, it's time to style your contact form using CSS. Here are a few important CSS properties you can use to enhance the visual appearance:
- font-family and font-size to define the text style.
- padding and margin properties to create spacing around the form elements.
- border and border-radius to customize the borders of input fields and buttons.
- background-color and color to set the background and text color.
You can further customize the form by adding background images, gradients, or animations to make it visually appealing and aligned with your website's overall design. Experiment with CSS until you achieve the desired look and feel.
Adding Validation to the Form
Validating user input is crucial for ensuring the accuracy and completeness of the information submitted through your contact form. Implementing validation rules helps prevent errors and enhances the user experience. Here's how you can add basic form validation using HTML5 attributes:
- required: Adding the required attribute to input fields ensures that they must be filled in before the form can be submitted.
- type="email": Using this attribute on the email input field ensures that users enter a valid email address.
- pattern: The patternattribute allows you to define a specific pattern for input validation. For example, you can use it to enforce a specific phone number format.
By implementing proper validation, you can guide users to provide accurate information and avoid common mistakes.
Enhancing the User Experience with JavaScript
JavaScript can take your contact form to the next level by providing real-time feedback, error handling, and additional features. Here are a few ways you can enhance the user experience with JavaScript:
- Real-time Validation: Use JavaScript to validate form inputs as users type, providing instant feedback on errors or formatting requirements.
- Error Handling: Implement error messages or tooltips to guide users when they make mistakes or forget to fill in required fields.
- Success Message: Display a confirmation message or redirect users to a thank-you page after successful form submission.
- AJAX Submission: Use AJAX to submit form data asynchronously, preventing page reloads and providing a seamless user experience.
JavaScript allows you to create a more interactive and user-friendly contact form, improving engagement and overall satisfaction.
Conclusion
A custom CSS contact form is a valuable addition to your website, facilitating effective
communication with your audience. By following the steps outlined in this article, you can
create a visually appealing form that aligns with your website's design. Remember to
incorporate validation and consider enhancing the user experience with JavaScript.
If you enjoyed this piece, we've crafted a related article delving into PHP Factorial Programming. Explore it here.
final thought
 A well-implemented contact form will not
only help you connect with visitors but also improve your website's overall
professionalism and user engagement.
A well-implemented contact form will not
only help you connect with visitors but also improve your website's overall
professionalism and user engagement.
by Marketing Team
final thought
A well-implemented contact form will not only help you
connect with visitors but also improve your website's overall professionalism and user engagement.